
Keeping your Android operating system up-to-date is crucial for both security and performance. Running the latest Android OS version ensures you have the most recent security patches to protect your device from malware and other threats. Furthermore, Android updates often include performance enhancements, new features, and bug fixes, contributing to a smoother and more enjoyable user experience. This simple guide will walk you through the process of updating your Android OS, ensuring your device is running at its best.
Whether you’re looking to improve your device’s security, enhance its performance, or simply explore the newest features, understanding how to update your Android OS is essential. This guide provides a straightforward, step-by-step approach to navigating the Android update process. From checking your current version to troubleshooting potential issues, we’ll cover everything you need to know to keep your Android device running smoothly and securely with the latest Android OS version.
Checking Your Current Android Version
Before embarking on an Android update, it’s crucial to know your current OS version. This information helps determine compatibility with the latest update and allows you to anticipate potential changes and new features. Locating your Android version is a straightforward process, typically involving a few taps within your device’s settings.
Generally, you can find your Android version information within the “About phone” or “About device” section of your settings. The exact path may vary slightly depending on your device’s manufacturer and Android version, but the keywords “About phone” are usually consistent. Within this section, look for an entry labeled “Android version” or similar. This will display your current operating system version number, for instance, “Android 12” or “Android 13”.
Knowing your current version is the first step in a successful update process.
Backing Up Your Data Before Updating
Before embarking on an Android OS update, backing up your data is a crucial precautionary step. While updates are generally reliable, unforeseen issues can occasionally arise, potentially leading to data loss. Creating a backup ensures you can easily restore your valuable information should any problems occur.
Several backup methods are available. Using your Google account, you can back up a wide range of data, including contacts, app data, and Wi-Fi passwords. This method offers a seamless and convenient way to safeguard your information. Alternatively, you can back up specific files, like photos and videos, to a computer or a cloud storage service. Choose the method that best suits your needs and provides the most comprehensive protection for your important data.
Connecting to a Stable Wi-Fi Network
Before initiating the update process, ensure you are connected to a stable Wi-Fi network. Updating over a cellular network can incur significant data charges and may be interrupted by network instability. A stable connection is crucial for a successful download and installation.
Choose a Wi-Fi network with a strong signal. You can usually gauge signal strength by the Wi-Fi icon in your notification bar. Avoid public Wi-Fi networks, as they can be congested and unreliable. If possible, connect to your home or office Wi-Fi network, where you have more control over the connection quality.
Once connected, verify the internet connection by opening a web browser or an app that requires internet access. This ensures that your device is properly communicating with the network and ready for the download.
Accessing System Updates in Settings
Locating the system updates section within your device’s settings may vary slightly depending on your phone’s manufacturer and Android version. However, the general process remains similar. Begin by opening your device’s Settings app. This is typically represented by a gear or cogwheel icon.
Once in Settings, look for an option labeled “System,” “About Phone,” or something similar. The exact wording can differ, but it usually refers to core system information and controls. Tap on this option.
Within this section, you should find an entry related to software updates. Common labels include “System updates,” “Software update,” “Software versions,” or variations of these. Tap on this option to proceed to the update check.
Downloading and Installing the Update
Once you’ve located the system updates section, the availability of a new Android version will be displayed. If an update is available, tap the “Download” button. The update file size can be quite large, so ensure you have ample storage space available.
After the download completes, you’ll typically see an option to “Install” or “Restart & Install.” Tapping this initiates the installation process. Your device will reboot and begin applying the update. This process may take several minutes, and your device will be unusable during this time. Do not interrupt the process by powering off your device.
Upon successful installation, your device will restart again and boot into the updated Android version. You can verify the successful update by checking your Android version in the settings, as described earlier.
Troubleshooting Common Update Issues
Sometimes, the update process doesn’t go as planned. Here are some common issues and how to address them:
Insufficient Storage
Error Message: “Insufficient storage available.” Solution: Free up space on your device by deleting unnecessary files, apps, or clearing cache.
Network Problems
Error Message: “Unable to download update,” or “Connection lost.” Solution: Ensure you have a stable Wi-Fi connection. Try resetting your network connection or switching to a different network.
Corrupted Update File
Symptoms: The update process freezes or fails repeatedly. Solution: Try downloading the update again. If the issue persists, consider factory resetting your device (after backing up your data).
Compatibility Issues
Symptoms: Apps crashing or malfunctioning after the update. Solution: Check if your apps are compatible with the new Android version. Update your apps via the Google Play Store or contact the app developer.
Verifying the Update Installation
After the update process completes, it’s crucial to verify the installation was successful. Several ways exist to confirm your Android OS has been updated correctly.
First, check the “About Phone” section in your device’s settings. Look for “Android Version” or a similar entry. This should reflect the latest version number you installed. Comparing this with the pre-update version confirms the change.
Additionally, observe any visual changes. Updated operating systems often introduce new interface elements, icons, or design tweaks. While not always dramatic, these subtle differences can indicate a successful update.
Finally, test core functionalities. Open a few apps, check your notifications, and make a test call. Ensure everything is functioning correctly. If any issues persist, it might indicate a problem with the update process.
Tips for a Smooth Update Process
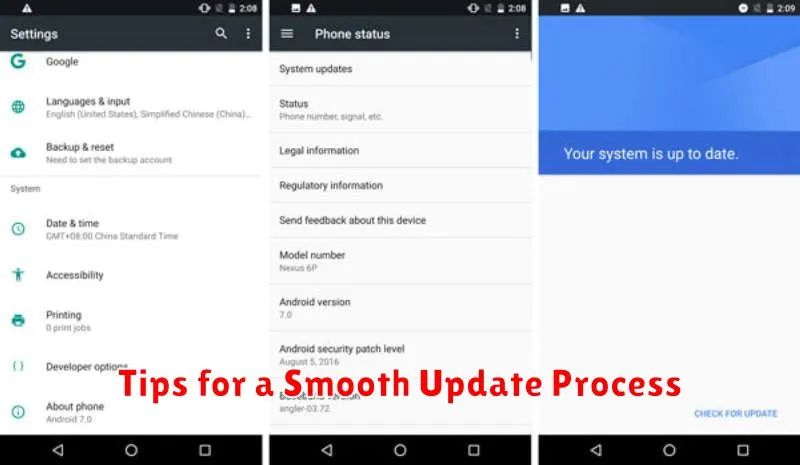
Planning ahead can significantly improve your Android update experience. Back up your data before initiating the update. This precaution safeguards your information should any unforeseen issues arise during the process.
A stable Wi-Fi connection is crucial for a seamless download and installation. Avoid using mobile data for updates, as large file sizes can incur significant charges and potentially interrupt the process. Ensure your device is plugged into a power source to prevent unexpected shutdowns.
Sufficient storage space is essential. Clear unnecessary files or apps before the update to ensure ample room for the new OS version. Check your device’s storage settings to confirm available space.
Once the update is complete, restart your device to allow the changes to take effect properly. This simple step can resolve minor glitches and optimize performance.