
In today’s fast-paced digital world, the need to scan documents quickly and efficiently has become paramount. Whether you’re dealing with important contracts, receipts, or academic papers, having a reliable method to digitize these physical copies is essential. Moving from paper to digital not only streamlines organization but also ensures the safekeeping of vital information. This article will explore the effortless process of scanning documents on your phone, eliminating the need for bulky scanners and simplifying document management.
Gone are the days of relying on cumbersome desktop scanners. With the powerful technology available in modern smartphones, scanning documents has never been easier or more convenient. Learn how to seamlessly transition from paper to digital using just your phone’s camera and a few simple steps. Discover the best practices for achieving high-quality digital scans, including tips for optimizing lighting and image clarity. Unlock the potential of your mobile device and transform your phone into a portable document scanner, empowering you to manage your paperwork efficiently, wherever you are.
Exploring Different Document Scanning Methods on Your Phone
Several methods exist for digitizing paper documents using your phone. Choosing the right one depends on your needs and available resources. Let’s explore the most common options.
Dedicated Scanning Apps
Scanning apps offer a comprehensive suite of features designed specifically for document digitization. These apps often leverage advanced algorithms to automatically detect document edges, correct perspective distortion, and enhance image quality. They also typically offer features like OCR (Optical Character Recognition), cloud storage integration, and various export formats (PDF, JPEG, etc.).
Built-in Phone Camera Functionality
Many modern smartphones include document scanning capabilities within their default camera apps. This option offers a quick and convenient way to capture documents without installing additional software. While not as feature-rich as dedicated scanning apps, they can be sufficient for basic digitization needs.
Third-Party Camera Apps
Some third-party camera apps provide document scanning modes alongside their core photography features. These apps may offer a balance between convenience and advanced functionality, bridging the gap between basic camera capabilities and dedicated scanning apps.
Choosing the Best Document Scanning App for Your Needs
Selecting the right scanning app can significantly impact the quality and efficiency of your digital document creation. Consider these factors when choosing an app:
Key Features to Consider
Accuracy: Prioritize apps known for accurately capturing text and details, especially if you plan to use Optical Character Recognition (OCR).
OCR Capabilities: If you need searchable or editable text, ensure the app offers robust OCR functionality.
File Format Options: Check for compatibility with commonly used formats like PDF, JPG, and PNG. Consider if you need specific formats for archiving or sharing.
Editing and Enhancement Tools: Look for features that allow you to crop, rotate, adjust brightness and contrast, and remove unwanted elements.
Cloud Integration and Storage: If you require cloud storage or automatic backups, verify the app’s integration with services like Google Drive, Dropbox, or iCloud.
User Interface and Ease of Use: A clean and intuitive interface can streamline the scanning process. Look for apps that are simple to navigate and use.
Cost: While many excellent free apps exist, some premium options offer advanced features for a fee. Assess your needs and budget to determine the best value.
Preparing Your Documents for Scanning
Before you begin scanning, taking a few moments to prepare your documents can significantly improve the final result. A clean, flat surface is essential. Avoid scanning on textured or patterned surfaces as these can interfere with the scan’s clarity.
Flatten any folds or creases in your document as much as possible. This will help ensure an even scan and prevent shadows from distorting the image. For stubborn creases, you can carefully place the document under a heavy book for a short time to help flatten it.
Ensure the document’s edges are clearly visible within the scanning area. This allows the scanning app to accurately detect the document’s boundaries and crop it correctly. If you’re scanning multiple pages, make sure each page is individually positioned before initiating the scan.
Clean the document’s surface, especially if it has any smudges, marks, or dust. A soft, clean cloth can be used to gently wipe away any debris. This will help minimize unwanted artifacts in the digitized version.
Using Your Phone’s Camera to Scan Documents
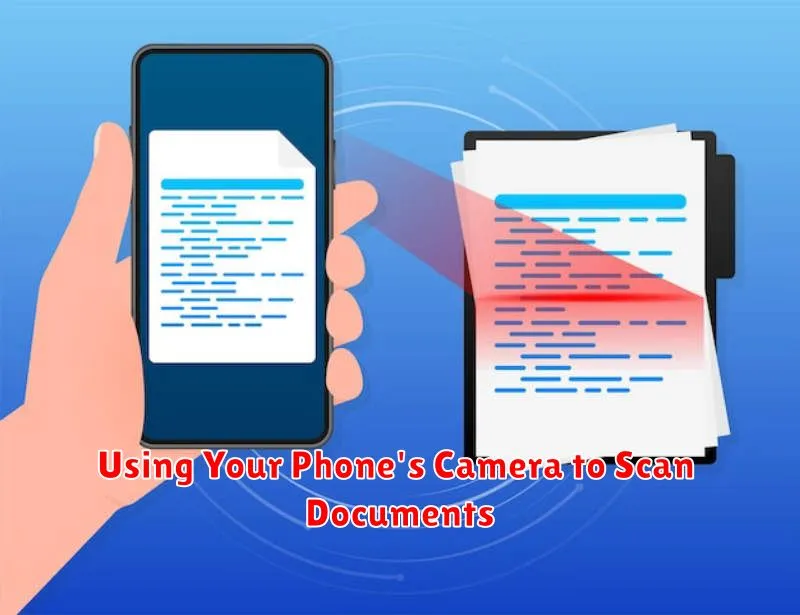
Your phone’s built-in camera offers a convenient and readily available tool for scanning documents. While dedicated scanning apps offer advanced features, using your camera directly can be a quick solution for simple scanning tasks. Follow these steps for effective document scanning with your phone’s camera:
Find a well-lit area: Adequate lighting is crucial for clear scans. Avoid harsh shadows and glare, which can obscure details. Position your document on a flat, contrasting surface.
Hold your phone steady: Minimize blur by holding your phone directly above the document. Avoid tilting or angling the camera. Some phones offer a document scanning mode within the camera app that automatically detects document edges and reduces distortion. If available, use this mode for optimal results.
Capture the entire document: Ensure all corners and edges of the document are within the frame. Leave a small margin around the document to facilitate cropping later.
Take the photo: Tap the shutter button to capture the image. Review the image and retake if necessary.
Enhancing Scan Quality with Editing and Adjustments
After scanning a document, several tools can optimize its readability and appearance. Most scanning apps offer built-in editing features to refine your digital copies.
Cropping is essential for removing unwanted background or aligning the document’s edges precisely. This creates a cleaner, more professional look.
Adjusting the brightness and contrast can significantly improve the legibility, especially for documents with faded text or uneven lighting. Increasing the contrast often sharpens the text against the background.
Rotation tools ensure your document is correctly oriented, a critical step for proper archiving and easy viewing. This is particularly useful for scans that might be slightly skewed.
Some apps offer perspective correction, which digitally flattens the document as if it were lying perfectly flat on a scanner. This is helpful for scans taken at an angle.
Finally, consider using filters, such as black and white or grayscale, to improve readability and reduce file size. These filters can also help to eliminate background noise and enhance the clarity of the text.
Saving and Organizing Your Scanned Documents
Once you’ve digitized your paper documents, proper saving and organization is crucial for easy retrieval. Choose a consistent file naming convention that makes sense for you. This might involve dates, keywords, or document types. For example, “UtilityBill_2024_01” or “Contract_ClientName.”
Consider using cloud storage services for backup and accessibility across devices. These services often offer features like automatic syncing and search functionality. Alternatively, you can save your scans locally on your phone or computer, organizing them into clearly labeled folders.
File formats also play a role in organization. PDF is a popular choice for its compatibility and ability to preserve formatting. However, if you need to edit the text, consider saving a copy in a format like DOCX.
Regularly review your scanned documents and delete any that are no longer needed. This will help keep your digital files manageable. Implement a system for archiving older documents that you need to retain but don’t access frequently.
Sharing Your Scanned Documents Securely
Sharing scanned documents digitally offers convenience, but security is paramount. Choose sharing methods wisely to protect sensitive information.
Email: For less sensitive documents, email is a practical option. Consider using password-protected ZIP files for added security.
Cloud Storage Services: Services like Google Drive, Dropbox, or OneDrive allow secure storage and sharing. Control access by setting permissions for specific recipients.
Messaging Apps: While convenient, messaging apps may not offer the same level of security. Exercise caution when sharing sensitive information through these platforms.
Direct Transfer: Methods like Bluetooth or AirDrop offer direct device-to-device transfer. Ensure the receiving device is trusted and the connection is secure.
Regardless of the chosen method, always review the document before sharing to avoid accidentally sending confidential information.
Troubleshooting Common Scanning Issues on Your Phone
Occasionally, you might encounter issues while scanning documents. Here are some common problems and their solutions:
Blurry Scans
Cause: Phone movement or poor lighting. Solution: Hold your phone steady and ensure adequate lighting. Try using a document scanning app’s built-in features to enhance image quality.
Shadowed Images
Cause: Light source positioned incorrectly. Solution: Adjust the light source to minimize shadows. Avoid casting your own shadow over the document.
Cropping Issues
Cause: Automatic edge detection failure. Solution: Manually adjust the cropping boundaries within your scanning app. Ensure the entire document is captured.
App Crashes
Cause: Software bugs, insufficient phone storage, or incompatible app version. Solution: Restart the app or your phone. Clear app cache or reinstall the app. Check for app updates.
Distorted Scans
Cause: Document not placed flat. Solution: Ensure the document lies completely flat on a surface to avoid distorted images.